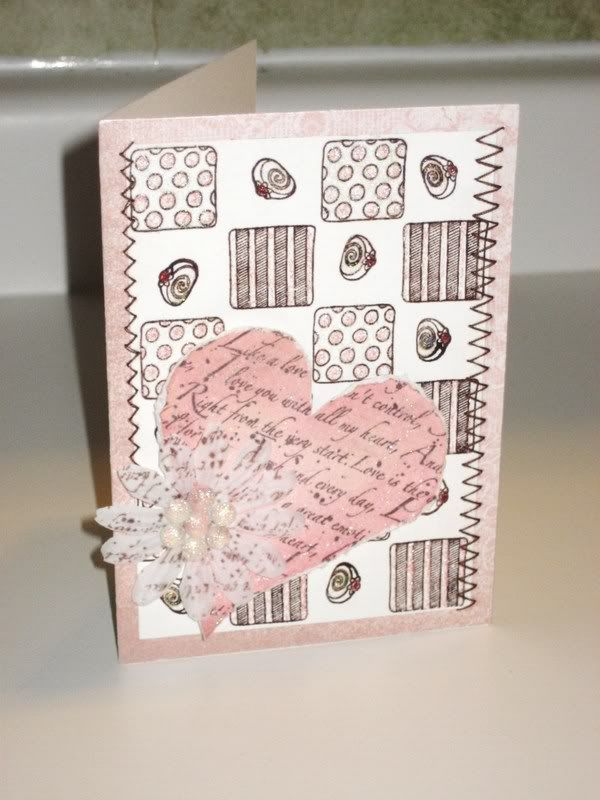
Just a warning now before I start posting, this post will be PICTURE-heavy! I haven't had a lot of time to really play around or try a bunch of different techniques with so many things going on, but tonight I sat down in my chair with a certain idea in my head and holy moly, it turned out just as, if not BETTER than the idea I had! YES! (Don't you loooove those moments???)
So in celebration of the upcoming CHA and the release and display of the Polka-Dot-Pie line there, here is my "romantic words" valentine, although I'm not really sure who I love enough to actually give this to them...HAHAHAHA! (I'm just joking....kind of...)
So without further ado... 


Techniques and Materials (all products and materials are from http://www.pezadoodle.com unless otherwise stated)
I first started with my mix and match background (Polka-Dot-Pie background stamp from Pezadoodle). I first inked with Versamark watermark pad and then pressed the background stamp into Adirondack ink. This allowed for me to pour a clear embossing powder over everything and emboss to have nice raised outlines for my background with a nice, intense brown color!
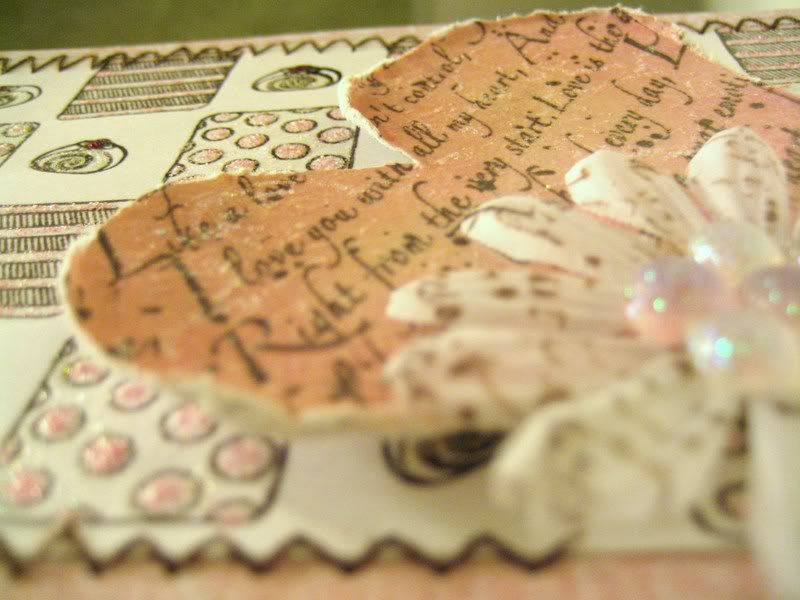
Next, my never-fail turn-to technique...STICKLES. I went eeextra glittery today and pretty much STICKLED everything in the background. I used Start Dust and Baby Pink Stickles as well as Ruby Red Distress Stickles for the little candy top. I'm a bit impatient so I heat gunned everything to dry faster.
For my heart, I cut it with my Cricut and Studio G inked the living daylights out of it. I versamarked and inked my "romantic words" background stamp and embossed. What happened here was that the Studio G ink was also still wet when I poured embossing power, so the ENTIRE heart ended up getting embossed which turned out pretty great...after that, MORE STICKLES. I put the nozzle straight down and swirled it all over while squeezing, so it's got a nice swirly sparkly pattern if you look closely...I used Tim Holtz paper distresser to distress my heart!
For added extraness, I took a 'silk' flower and pressed it into my still wet "romantic words" background ink and heat embossed. Because of the fabric, it didn't turn out too clear, but I ended up liking this look better.
Pop-dotted all of that and used my Sugar Pops for the flower middle.
Last but certainly not least, I hand-stitched (I am COMPLETELY hopeless with an actual sewing machine) so I measured out and pierced my holes and then stitched! Sorry for all the chitter chatter, I'm just SO loving this latest work of mine!
CURRENT MOOD: CURRENTLY LISTENING TO:


3 comments:
so fabulous & romantic!
thats AWESOME!! so lovin it!!!!
That's a really beautiful card! I can't believe you went to all that trouble to hand stitch all that, but it looks great!
Post a Comment